

The Homegrown Tomato Trick that Saved My Sanity


Plan your best garden with simple, step-by-step instructions!
This post may contain affiliate links, which means I make a small commission at no extra cost to you.
See my full disclosure here.
I wish someone had told me this homegrown tomato trick long ago! It’s currently saving my sanity as the tomatoes are rolling in from the garden.
A robust harvest of homegrown tomatoes is a blessing. Every year I’m thankful to put up jars upon jars of home canned tomato sauce, tomato jam, ketchup, salsa, and more.
But when tomatoes are pouring forth from the garden and taking over every available space on my kitchen counters, I’m grateful for a quick way to preserve their sun ripened flavor without losing my mind.
This method also works well for a small but ongoing tomato harvest. If you have only a few tomato plants that produce over time, you can use this method to “save up” ripe tomatoes until you have enough for canning.

A few favorite tomato canning recipes:
Homegrown tomato trick
Once you learn this homegrown tomato trick, you’ll never go back!
It’s a simple technique that seems kind of obvious, but I can’t believe how many years I grew tomatoes without performing this critical step.
Similarly, I’m always surprised by how many gardeners have yet to learn this easy method. It seriously keeps me sane during our late-summer tomato mania.
 Freeze those tomatoes!
That’s it! Simply core and freeze your whole, ripe tomatoes. If you’d like a few more details, you can keep scrolling to learn my exact process.
Update: I’ve also started freezing chopped tomatoes. They get weighed and labeled just like the whole tomatoes, and are handy for canning certain recipes later on.
PS: another sanity-saving trick for homegrown tomatoes is to turn them into tomato powder. Here’s what you need to know: How to make & use tomato powder.
Benefits of freezing homegrown tomatoes:
- Can when you want to – no more rushing to can tomatoes before they spoil.
- Prevent tomato waste – no more rotting tomatoes.
- Avoid fruit flies– fewer spoiled tomatoes means fewer fruit flies.
- Preserve flavor – retain that amazing homegrown flavor by freezing ripe tomatoes.
Important tip: Avoid storing homegrown tomatoes in the refrigerator! Refrigeration makes tomatoes taste like cardboard. They will lose their flavor and develop a mealy texture.
How to freeze homegrown tomatoes
1. Harvest
First of all, I try to harvest tomatoes as soon as they start to turn. Meaning, the day they begin to blush orange, I pick them and bring them inside the house.
This helps to prevent cracking, splitting, and damage from bugs or birds.

2. Line ’em up
Next, I line up the ripening tomatoes on a kitchen counter, out of the way. I like to spread a towel on the counter and arrange the tomatoes on top.
I’ve found this step to be key in preventing rot.
It’s hard to keep an eye on ripening tomatoes piled in a bucket or basket. Inevitably, the tomatoes down near the bottom start to rot where I can’t see them.
Then the fruit flies set in, which just drives me crazy. Once fruit flies arrive, it’s really hard to get rid of them.
This step can be tricky if you lack counter space, but try to think outside the box. Where can you line up all your ripening tomatoes?

3. Sort daily
…or almost daily. Truthfully, I often go for several days between tomato sortings.
The key is to keep weeding out the ripe tomatoes before they rot. As soon as they’re all ripe and delicious, that’s the time when you want to get them into the freezer.

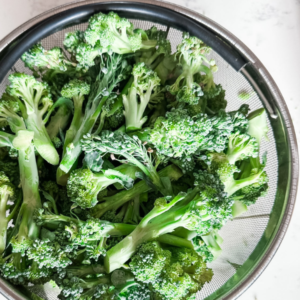
4. Rinse and core
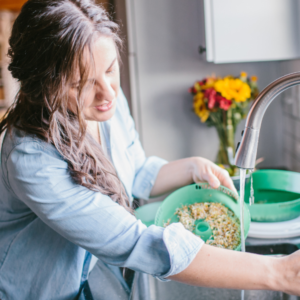
When you’ve got enough ripe tomatoes to fill a gallon-size freezer bag, rinse the ripe tomatoes and lay them on a clean towel to dry.
Prepare your knife, cutting board, compost pail, freezer bags, scale, and a permanent marker. I like to label each freezer bag before adding the tomatoes.
Note: an actual kitchen scale is probably best. I don’t have one, so I improvise with my digital postal scale.
Then use a sharp, serrated knife to remove the stem along with any bad spots.

5. Bag and weigh
As soon as I core each tomato, it goes into the labeled freezer bag. I like to freeze my tomatoes in four pound quantities, which makes it easier when it’s time to can.
Once you’ve filled a few bags of tomatoes, you’ll get better and better at estimating the weight. I get pretty close, but still like to weigh each bag to make sure.
When each bag reaches about four pounds, I squeeze out the air and seal the bag. I’m usually able to stack up the filled bags until I’ve bagged up every ripe tomato.

6. Freeze
Finally, the stacked 4-lb. bags of cored, ripe tomatoes go into the freezer.

7. Thaw and process
This is the most exciting part: now you can process your homegrown tomatoes whenever you want to! Whenever your schedule allows, or whenever it’s time to clear out the freezer {ahem}, you are now able to can a big batch of tomatoes all at once.
When possible, I try to thaw bags of tomatoes in the sink for a few hours or even overnight. But I’ve also dumped frozen tomatoes right into a cooking pot on canning day.
And that’s it! You can proceed as usual with your tomato canning recipes.

I hope this method for freezing whole, ripe, homegrown tomatoes makes as much of a difference for you as it did for me.

Learn how to can, dry, and freeze your tomatoes to last all year long!

")
Sign up NOW for my best tips delivered weekly to your inbox!
You’ll also get instant access to my library of free ebooks and resources.
You might also like...


5 responses to “The Homegrown Tomato Trick that Saved My Sanity”
-
Thanks for the tips! No need to peel, correct? Just core? Whenever I have frozen tomatoes I have always blanched and peeled first. I just want to make sure before trying:) Thanks!
-
That’s right, just core and freeze. It’s the best! (The skins will be removed in the food mill after cooking, after you pull the tomatoes out of the freezer for canning.)
-
-
Thank you! Do you have a blog post on your food mill or which one you recommend? I don’t have one which is probably why I have always blanched and peeled before freezing.
-
Such a simple thing, but I’m sure this is going to save my sanity this summer! Thank you for sharing- can’t wait until my plants are putting out, and try this.
-
Hi Amy, Sometimes the simple things make all the difference! Happy tomato growing (and freezing)!
-
Leave a Comment