How to Grow Organic Pest-Free Broccoli

Plan your best garden with simple, step-by-step instructions!
This post may contain affiliate links, which means I make a small commission at no extra cost to you.
See my full disclosure here.
Struggling with caterpillars on your broccoli? I’ll show you how to grow organic pest-free broccoli. This method also works for other brassicas like cauliflower, cabbage, and kale.

How to Grow Organic Pest-Free Broccoli
There’s nothing like the taste of homegrown broccoli! My favorite way to prepare fresh broccoli involves charring it in a cast iron skillet with lots of garlic. Yum!
However, growing broccoli is no easy task thanks to three types of caterpillars who love to chomp on the leaves of the broccoli plant:
- Cabbage loopers
- Cabbage worms
- Diamondback worms
The only way I have found to grow organic pest-free broccoli is to protect my plants with a row cover tunnel.
Believe me, I’ve tried many ways to control these destructive worms without resorting to sprays or powders, and this is by far my favorite method.
See my broccoli row cover tunnel in action. Can’t see the video? Click here to watch.
How to create a row cover tunnel to protect broccoli
Tools and supplies
- rebar stakes
- 1/2-inch electrical conduit
- hammer
- row cover (see below)
- clips
- optional: rocks
- optional: soaker hoses
Instructions
Pro tip: prepare the bed in advance.
For me, this includes:
- Removing weeds
- Refreshing with a thick layer of compost.
- Topping with a thick layer of aged wood chips.
- Optional: arranging soaker hoses on top of the wood chips.
Note: if you plan to use soaker hoses to keep your broccoli watered, decide whether to place the hoses under the wood chips or on top.
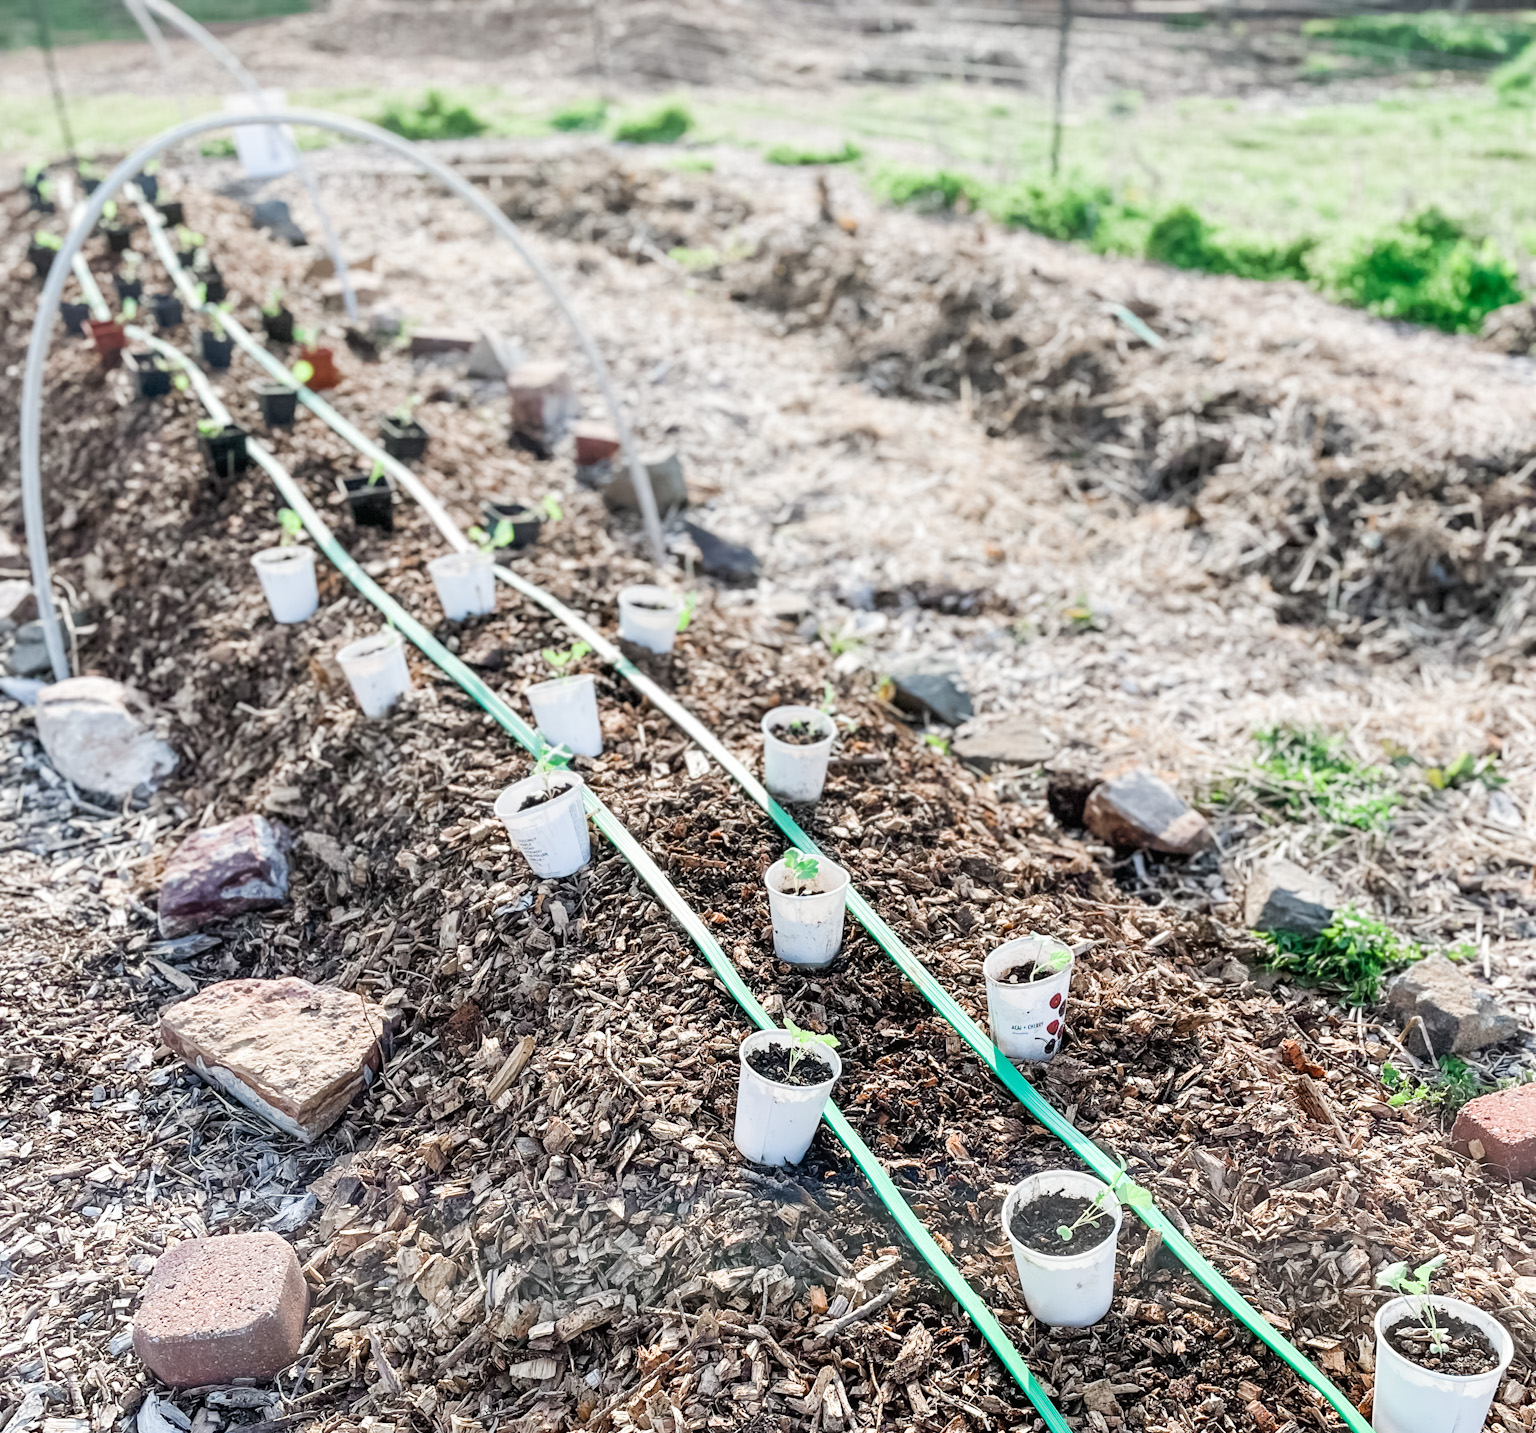
At planting time, I plant my seedlings through the wood chips, directly into the compost. In other words, I scooch the wood chips aside, plop the seedling onto the compost, and then push the wood chips back around the plant.

Step one: plan
- Decide on the length of your broccoli row.
- Consider the length of any soaker hoses you will use to water this row.
- Also consider the length for available row cover options. (See below.)
Keep in mind that your row should be shorter than the row cover length. You will need approximately three feet of row cover on each end in order to secure it to the ground. Therefore, a 50′ row cover will cover a 44′ row.

Step two: materials
- Choose the right row cover for your needs. (See below.)
- Purchase conduit for the hoops, rebar stakes to secure the hoops, and clips to secure the row cover to the hoops.
- You will need at least six hoops and 12 rebar stakes for a 40-50′ row. Feel free to add more hoops for optimal row cover support. The more hoops, the less the row cover will sag between the hoops.
- I recommend 3 clips per hoop. 6 hoops = 18 clips.

Step three: hoops
- Place the first hoop by pounding in a rebar stake on one side.
- Next, fit one end of a piece of conduit over this stake and press down firmly to secure.
- Then, bend the hoop across the row to find the right place to pound in the second rebar stake.
- Finally, pound in the second rebar stake and fit the other end of the conduit hoop over this stake. Press down firmly to secure.
- Continue this process for the remaining hoops.
- To determine proper spacing of hoops, divide your total row length by the number of hoops you plan to use. This will tell you how far to space your hoops. For example, 6 hoops for a 44′ row will be spaced about 7′ apart.

Step four: plant
Pro tip: you might want to skip to step five and complete the first 3 steps before planting your broccoli seedlings. This can help to avoid having to relocate seedlings if you need to reposition the end hoop.
- After the hoops are in place, plant your broccoli.
- Technically, broccoli plants should be spaced 18″ apart, but I find it difficult to adhere to this recommendation!
- Before I plant, I lay out my soaker hoses and use them as a guide for planting.

Step five: row cover
- You will need a helper for this step.
- Unfold the row cover and clip one end to the first hoop, allowing about 3 feet of extra fabric to hang down to the ground.
- Your helper should take the other end of the row cover to the last hoop. Evaluate the row cover placement to determine if more material is needed on either end, or if the end hoop needs to be moved.
- When you have the cover lined up properly on both ends of the tunnel, secure one end with a clip.
- Use a clip to secure the cover to the next hoop, continuing this process from the first hoop to the last hoop.
- Use clips to secure the sides of the row cover to the hoops on either side, close to the ground.
- If your row cover has extra fabric on the sides and wind is a concern for you, weigh down the sides with rocks, bricks, sandbags, etc.
- At each end of the tunnel, gather the extra fabric and secure with rocks, etc.

How to choose the right row cover
What I used: 1.25 oz, size 15′ x 50′
- This was exactly what I needed. The 1.25 oz weight classifies this row cover as a frost blanket, but this heavy-duty weight is necessary to withstand the strong winds on our farm.
- A 15′ width is hard to find, but I like this size because it gives me plenty of extra fabric on either side of my tunnel. This allows me to weigh it down with rocks, which we have a good supply of.
- 50′ in length closely matches my 50′ soaker hose length, which works out perfectly.
- Note: the exact row cover I used is no longer available, so unfortunately, I’m unable to provide a link. I hope the details I’ve shared will help you identify the best row cover for your needs.
Row cover tips
- Weight: If you don’t struggle with high winds, you can choose a lighter weight row cover. You might want to look for something around 1 oz or even .5 oz in weight.
- Width: Again, if wind isn’t a concern for your garden, you might get away with 10′ in width. This would match the exact length of the 10′ hoops, and you can secure at the bottom with clips.
- Length: Choose the length that best suits your garden space.
Do you grow broccoli? Are caterpillars a problem for you?

Sign up NOW for my best tips delivered weekly to your inbox!
You’ll also get instant access to my library of free ebooks and resources.


