How to Raise Pastured Poultry, Part 2: DIY Chicken Tractor

Plan your best garden with simple, step-by-step instructions!
This post may contain affiliate links, which means I make a small commission at no extra cost to you.
See my full disclosure here.
Your baby chicks have arrived and you’ve got them all settled into their new DIY Brooder. High five! The next step is to build your DIY Chicken Tractor.
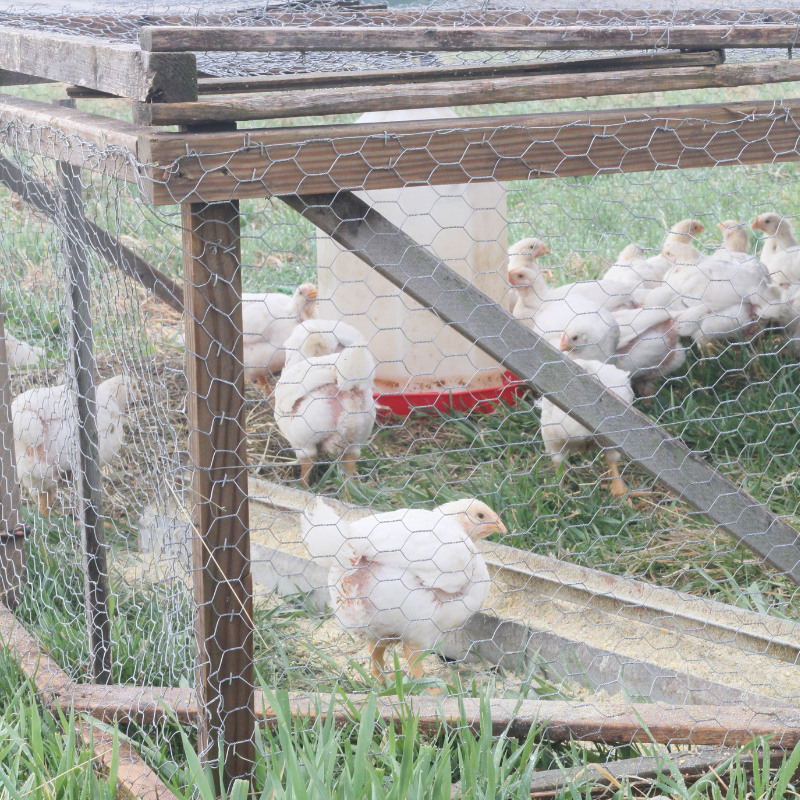
The chicken tractor is where your chicks will live starting around three weeks of age. At three weeks, you’ll transfer the teenage chicks from the brooder to the chicken tractor so they can eat grass and bugs along with their feed. You’ll move the chicken tractor to a new patch of grass every morning and every evening.
This DIY chicken tractor should be light enough to pull forward one length and sturdy enough to withstand the elements. One side of the tractor is protected with chicken wire to allow air flow while the other side is covered with steel to provide shade and rain cover.
We’ve chosen to raise Jumbo Cornish Cross broilers, which spend their first three weeks in the brooder and then five weeks in the chicken tractor. Believe it or not, these birds are ready to harvest at about eight weeks.

More from the meat bird archives:
- How to Raise Pastured Poultry, Part 1: DIY Brooder Pen
- The Real Cost of Raising Meat Birds: Year One
- The Real Cost of Raising Meat Birds: Year Two
- Our Big Meat Bird Mistake: How We Accidentally Killed 35 Chickens
- My Pastured Poultry System: How to Use Up Every Last Bit of a Whole Chicken
What’s the ideal size for a chicken tractor?
Our first chicken tractor (pictured above and in step 4) was 8 x 10 feet. It felt a bit cramped for 50-60 birds at a time. Our second chicken tractor was 10 x 12 feet, which was heavy for children and wives (only one wife, actually) to pull.
In our opinion, the ideal size for a chicken tractor designed to accommodate 50-60 meat birds is 10 x 10 feet.
DIY Chicken Tractor
This simple plan creates one 10×10 chicken tractor for about $200 in supplies. If you plan to raise fewer birds at a time, you can easily modify these instructions to create a smaller square.
Supplies
- 8-ft 2x2s (braces & lid): 12 or two 6-pks
- 10-ft 2x10s – rip two into 4 equal strips (sides)
- 12-ft 1x4s (crossbeam for lids): two
- 50-ft roll of 48” chicken wire: one roll
- Classic rib steel roof panel galvalume: three 12-ft panels for roof & three 8-ft panels for sides & lid
- Staples
- Screws – we recommend 1″ and 2.5″ or 3″ deck screws
- Strong rope (poly or nylon), or wire & garden hose (handle)
- Dolly (optional)
 Tools
Tools
- Table saw (or skill saw)
- Miter saw
- Staple gun
- Screw gun
- Wire snips
Instructions
Here’s a quick run down of the steps involved in building a DIY chicken tractor. Scroll down for detailed instructions.
1. Build the base.
- Create bottom frame.
- Create top frame.
- Join frames together.
- Add braces.
- Attach chicken wire (sides).
- Attach sheet metal (sides).
- Add crossbeam down center of top frame.
2. Build two lid frames.
- Create two frames.
- Attach chicken wire to both frames.
- Optional: attach sheet metal to one frame or part of one frame.
3. Adjust and add a handle.
Build the base:
Step 1: Using a table saw (or skill saw if that’s all you have), rip the 2x10s into four sections. Each section should be slightly larger than a 2×2.

Step 2: Using 3″ deck screws, attach four sections of the recently cut 2×10 pieces into a square. Repeat for a second square.

Step 3: Using a miter saw (or skill saw if that’s all you have), cut eight of the 2x2s into four equal sections. Each piece should be approximately 24″.

Step 4: Screw four of the 24″ 2×2 pieces into the corners to attach the two recently made squares. Use 2.5″ or 3″ deck screws.

Step 5: Using 2.5″ or 3″ deck screws, take 20 2×2 pieces and use them as brace supports, five to a side, spaced evenly.

Step 6: Attach two 24″ 2x2s diagonally across each corner for support using 2.5″ or 3″ screws. Do this at the top and bottom of the tractor base.

Add chicken wire and steel:
Step 7: Wrap the 48″ chicken wire around the outside of your recently formed box. Make sure the wire does not dip below the bottom boards. Cut away the excess wire. You should be left with roughly another 24″ of wire that you can use later in this project for a second chicken tractor. Or, let’s face it, if you have chickens, you can never have too much chicken wire.

Step 8: Attach the chicken wire to the wood frame with staples. Be liberal in your staple usage.

Step 9: Cut one of the 1x4s to match the width of the tractor and attach it at the midway (5′) mark across the tractor. Repeat going the other direction forming a T across the middle of the top of the tractor. We didn’t get a great picture of this step, but you can see where the T goes from this picture, marked in red...

Step 10: Wrap one of the 8′ galvalume sections down 5′ of the side of the tractor and 3′ around the back of the tractor. Attach with 1″ screws. Repeat on the other side. This will leave a 4′ gap in the back of the tractor. We’ll address that in Step 12.

Step 11: Take the three 12′ steel pieces and use them to form a roof over the back half of the tractor–the same 5′ you just wrapped the 8′ steel around. Make sure the middle piece is used to overlap the other two pieces. Cut off the extra 2′ of roofing using the metal snips. Attach the roof to the sides and the 1x4s using 1″ screws.

Step 12: Use two of the recently cut roofing sections to finish the back of the chicken tractor. Attach with 1″ screws. We recommend leaving a 1-2′ gap in the center to allow airflow.

Build the lids:
Step 13: Measure from the middle of the exposed 1×4 to the edge of the chicken tractor, then cut two 2x2s to match that width. Repeat for the other side.

Step 14: Measure from the middle of the 1×4 that the roof is attached to the end of the chicken tractor and cut two 2x2s to match. Repeat for the other side.

Step 15: Using the recently cut pieces form two squares to match the two roof openings on either side of the exposed 1×4. Each removable roof section will rest on the outer edge of the chicken tractor and the middle 1×4. Use 2.5″ screws to attach the sections.

Step 16: Cut chicken wire to fit across each roof sections. Note: it will take more than one strand of wire over each section. You don’t need to worry that they aren’t attached to each other. I’ve never had a predator attack from the roof. If you want to make it sturdier, then use wire to lace the sections together.
Here, Malachi is overlapping the sections of chicken wire and poking the ends through.

Note: Optionally, you can add sheet metal or wood to cover part or all of one of the lid sections. We did this for our first chicken tractor, but not for the second. Scroll down to see the last picture of me pulling the first chicken tractor.
Step 17: Similar to step 6, form corner braces out of 2x2s for each of the roof sections. We still need to complete this step for our second chicken tractor, but Greg’s injury interrupted our plans. If you scroll down to the final picture of me pulling our first chicken tractor, you can see the corner braces on the lid pieces.
Adjust and add handle:
Step 18: Use any remaining wood to brace any section you feel may be sagging.
Step 19: Use a rope or wire and old garden hose piece* to form a pull handle and tie it along the bottom front board of the chicken tractor. This will be used to lift up the front section of the tractor and pull it across the field. We use rope, but Joel Salatin strings wire through a cut section of garden hose, attaching each end of the wire to the front of the tractor frame and using the hose piece as a handle grip.

And that’s it! It’s really pretty straightforward. Our original diy chicken tractor has weathered two and a half growing seasons, with only minor repairs necessary each year to sturdy it up and keep it going strong.
What about you? Have you ever raised meat birds? Would you ever consider it? Does this DIY chicken tractor seem doable?


Sign up NOW for my best tips delivered weekly to your inbox!
You’ll also get instant access to my library of free ebooks and resources.
You might also like...
2 responses to “How to Raise Pastured Poultry, Part 2: DIY Chicken Tractor”
-
I like your site and these plans look great! I’m just looking for something small for my 7 pullets to get them out on a healthy variety of plants and bugs. I’ve been envisioning something like this, but now I have the plans! Thank you!
-
You’re so welcome! Hope your pullets love their new home. 🙂
-


Leave a Comment