How to Build a Raspberry Trellis
Plan your best garden with simple, step-by-step instructions!
This post may contain affiliate links, which means I make a small commission at no extra cost to you.
See my full disclosure here.
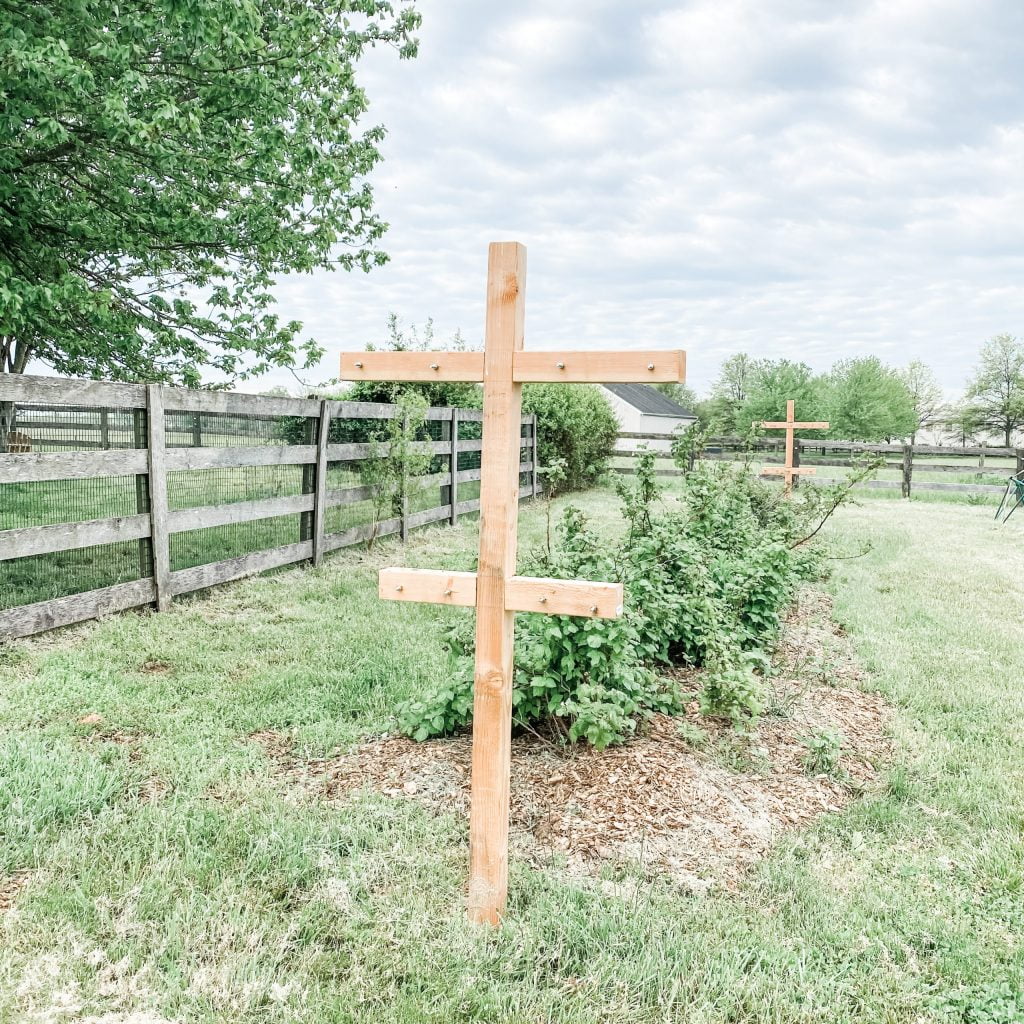
Wondering how to build a raspberry trellis for your backyard berries? I think you’ll love the simple method we used for our berries here on the farm.
You’ll need just a few supplies and a few simple tools. This process is so simple that it took my husband Greg less than two hours to construct and install.
And just like that, our raspberries and blackberries finally have the support they need. This trellis system should keep the berry plants in check, and allow for easier harvesting.
Plus this simple wooden trellis looks good. It definitely looks better than our previous setup of chicken wire wrapped around assorted stakes. Yikes!
Ready to learn how to build a raspberry trellis? Let’s do it!
We even made a video for you (see below) and printable step-by-step instructions, complete with tools and supplies lists. Click here to print the instructions from my Resource Library.
How to Build a Raspberry Trellis
Supplies
- (4) 8′ 4x4s
- (8) 3″ 3/8″ hex screws bolts with washers
- (16) 7″ eye bolts with nuts
- Wire (8x the length of your berry row, plus extra for attaching to eye bolts)
Tools
Instructions
Please note: these instructions will probably make more sense in combination with the video tutorial posted above. I suggest taking advantage of both! For best results, read the steps listed below and check out the video.
1. Cut crossbeams.
Use a miter saw to cut two 4x4s into two 2.5′ beams and two 3.5′ beams.
2. Notch crossbeams.
Use a table saw to create a notch in the center of each crossbeam. Each notch should be about 3.5″ high and 3.5″ wide, in order to match the dimensions of the 4x4s. (Because the dimensions of a 4×4 are actually closer to 3.5″ x 3.5″.)
The depth of each notch should be about half the depth of the 4×4, or 1.75″. You want the notch in the cross beam to fit into the notch in the post.
Note: in the video, you’ll notice Greg mentions different dimensions. He made 2.5″ notches on the crossbeams and 1.5″ notches on the posts. It doesn’t really matter, as long as the two notches add up to about 3.5″, or the full depth of a 4×4. We suggest making 1.75″ notches on beams and posts because it’s easier to keep track of just one number.
3. Notch support posts.
Then use a table saw to make two notches in each 8′ support post.
On each support post, we made a notch 1′ from the top and then made another notch 22″ below the top notch. The bottom notch will be about 3′ off the ground once the post is sunk.
Again, each notch should be about 3.5″ high, 3.5″ wide, and 1.75″ deep.
4. Sink posts.
At each end of the berry row, dig a hole about 2′ deep and sink one 8′ support post into each hole. Use a tamping bar to pack the soil firmly back into the hole around each post.
5. Drill center holes.
Fit crossbeams onto support posts with the longer beams on top and the shorter beams below. Pre-drill holes for the 3″ bolts, centering two holes where each crossbeam intersects with a post.

6. Secure crossbeams.
Secure each crossbeam with two 3″ bolts and washers. Place one washer on each 3″ bolt and use a socket wrench to insert the bolts into the pre-drilled holes.
7. Drill holes for eye bolts.
After the crossbeams are attached, pre-drill four holes on each beam for the eye bolts. You’ll want to space them somewhat evenly across the beams.
Our eye bolts are placed about 4″ and 10″ from the center notch on the lower (shorter) beam, and about 6″ and 16″ from the center notch on the upper (longer) beam.
8. Add eye bolts.
Add four eye bolts to each crossbeam. Secure each eye bolt with a nut on the back of the beam. For now, don’t worry about tightening the nuts.
9. Add wire.
Loop wire onto each eye bolt, then stretch across and attach to the opposite eye bolt.
10. Tighten wire.
To tighten the wire, tighten each eye bolt nut with a socket wrench.
11. Arrange plants.
If your berry plants are tall enough, pull the top ends through the wire supports. Wear gloves for this step!
As your berry bushes grow, continue to feed branches through the wire supports to keep everything tidy.
Do you have backyard berries? How do you keep them under control? If you give this trellis a try, be sure to post pictures and tag me on the ‘gram!

Sign up NOW for my best tips delivered weekly to your inbox!
You’ll also get instant access to my library of free ebooks and resources.
You might also like...
4 responses to “How to Build a Raspberry Trellis”
-
I did it! The ingredients and recipe worked great! I built 4 posts for 2 rows. My raspberries look much better and are nice and comfy.
-
Good job! Such a good feeling.
-
-
I have 5 plants all in one row… can it be supported by the two posts or should I put one in the middle for extra support?
-
I would feel comfortable supporting 5 plants with two posts. I think it’s more about how far apart the posts will be (how closely your plants are spaced).
-





Leave a Comment