Laundry Room Makeover, Part 2: The Sorting Closet {The Vision}

This post may contain affiliate links, which means I make a small commission at no extra cost to you.
See my full disclosure here.

Check out Laundry Room Makeover, Part 2: The Sorting Closet {Before} for the first part of this story…
The First Problem
First, there was the problem of where and how to sort laundry without leaving it out in the open and constantly underfoot.
The Second Problem
Next, was the related problem of what to do with the awkward “refrigerator closet”. We did have–and use regularly–a second fridge, but we prefer to keep it in the basement.
Inspiration Strikes
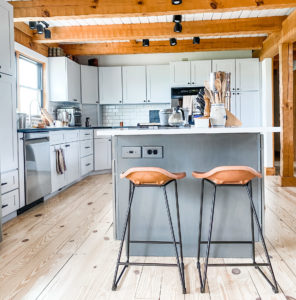
The first moment of inspiration came when I saw–with new eyes–this picture (to the right) in one of my home decor books.
(Okay, the book is really about organizing and storage: Stylish Storage: Simple Ways to Contain Your Clutter.)
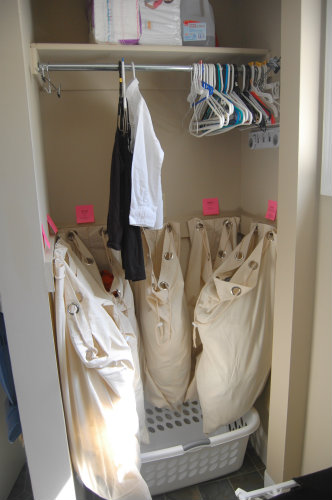
It sparked the idea to line the bottom part of the “refrigerator closet” with hanging laundry bags.
A Great Find, x6
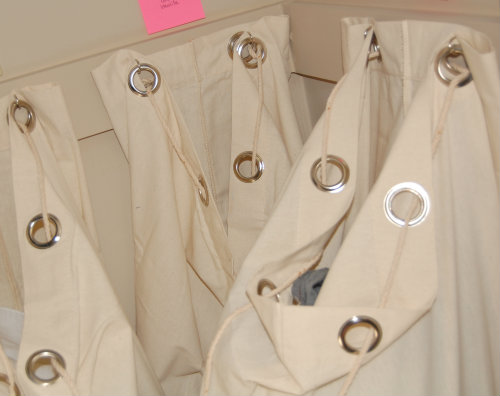
Soon after that, I happened to spot these cream-colored canvas laundry bags with grommets for $6 each at our local HomeGoods store.
In my mind, that little moment at HomeGoods involved streaming light from heaven with celestial harp music playing in the background–There were enough bags for the whole project! And they cost only $6 each! And the perfect color!–but Mr. Native Texan doesn’t remember it that way.
“These would be perfect for my laundry room idea!” I gushed.
“Great,” he said. (You can sense the enthusiasm, right?)
The Next Step: Hanging the Bags
Once we’d found the canvas bags–With grommets! For only $6!–Mr. Native Texan cut 2×4’s to size and painted them to match the walls, which had been coated with Sherwin Williams Nomadic Desert.
Which is much nicer than sea foam green, don’t you think?
We experimented with the bags and marked the right height for the 2×4’s, and then he secured them to the walls with drywall screws and covered the screws with matching paint. Then we marked the spots for cup hooks, and screwed those in.
And Now, for Labels
We hung the bags, and I labeled them with post-it notes until I could figure out a more lovely–and less neon–arrangement.
Removable chalkboard labels–and a paint pen–were the perfect solution. (See those in the “After” post, coming soon.)
What About the Top of the Closet?
Above the bags is a chrome tension rod that we happened to have on hand after our move.
It’s the perfect spot to keep hangers for the clothes that come out of the dryer and go directly into someone’s closet. It’s also where I keep clothes waiting to be ironed, and where I sometimes hang damp clothes to dry when they overflow from the nearby wall-mounted drying rack.
We left the existing shelf at the top, which is perfect for storing extra laundry supplies, and more.
Functional, but not Beautiful
Functionally, I was very pleased with The Sorting Closet. The hanging bags were just the ticket for getting the dirty laundry up off the floor. And starting a load of laundry was a cinch–simply unhook the appropriate bag and dump the contents into the washing machine.
I even began training Older Brother to sort his own laundry, which continues to this day. Mr. Native Texan never really got the hang of it, so I’m letting it slide, choosing to focus my training efforts on the next generation. 🙂
Aesthetically, it still left much to be desired.
Not to worry, I had a plan.
Stay tuned for the “After” post to find out how I disguised The Sorting Closet, making it both functional and aesthetically pleasing…

Sign up NOW for my best tips delivered weekly to your inbox!
You’ll also get instant access to my library of free ebooks and resources.


