

How to Refinish a Vintage Claw Foot Tub


Plan your best garden with simple, step-by-step instructions!
This post may contain affiliate links, which means I make a small commission at no extra cost to you.
See my full disclosure here.
I spent a lot of time psyching myself up for this project in our new log home farmhouse, but it turns out that it’s really pretty simple to refinish a vintage claw foot tub. And I’m so pleased with the results!
We used mostly elbow grease plus a few basic supplies to take this old cast iron tub from “dingy rusty flaky” to “clean shiny white’.
The exterior of the tub required a complete refinishing job but thankfully the inside of the tub cleaned up nicely with a bit of serious scrubbing. Our newly refinished tub may not look totally perfect, but it’s just right for our space.
Here’s how we did it…
How to Refinish a Vintage Claw Foot Tub
Step One: Find a Tub
Look for a tub with intact porcelain enamel. The enamel is the hard, shiny surface that coats the inside of the tub. The outside of the tub can be sanded and painted, but the enamel on the inside of the tub is more difficult to restore.
My advice is to stay away from chipped or severely rusted enamel, but don’t let grime or even moderate rust deter you.
Tip: use a rag (wet, if possible) to scrub the problem areas before you buy. Most marks will come right off!
If you do wind up with chipped or rusty enamel, it’s possible to give the inside of your tub a new surface. Brave souls can buy a kit and DIY it. Otherwise, you can hire out the job to a professional restoration expert.
Here’s a another tub I almost bought at our local ReStore. It was cheaper than the tub I eventually purchased at a flea market, but there were several significant chips in the enamel, some pretty serious water stains from the faucet area, and lots of old flaky (and potentially lead) paint on the exterior.
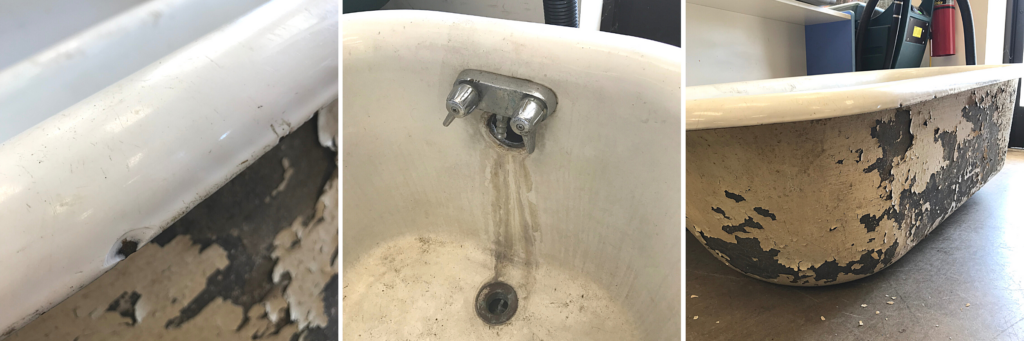
I hadn’t yet had a chance to research tub refinishing and felt pretty intimidated by its condition, so I let it pass. Maybe it would have turned out okay after some serious sanding and scrubbing, and that enamel chip was on the side that wouldn’t have been very visible.
But I’m pleased with the tub I found: most of the stains disappeared with a good cleaning, plus the tub’s exterior was already paint-free (albeit rusty). And our tub came with seven out of eight of the attachment pieces for the feet.
Step Two: Gather Supplies
Here’s what we used
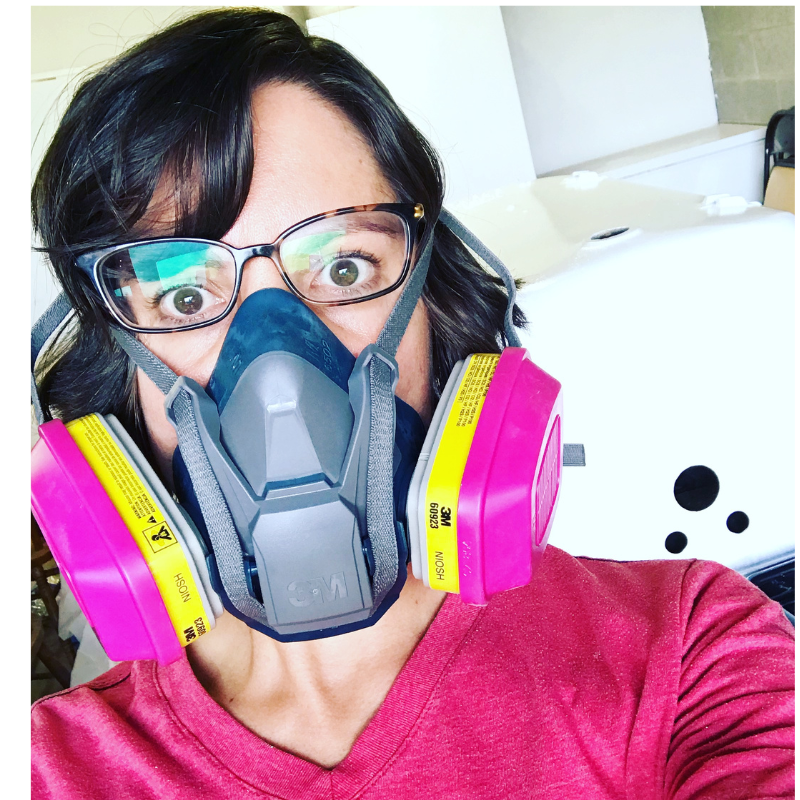
- heavy duty respirator
- safety glasses
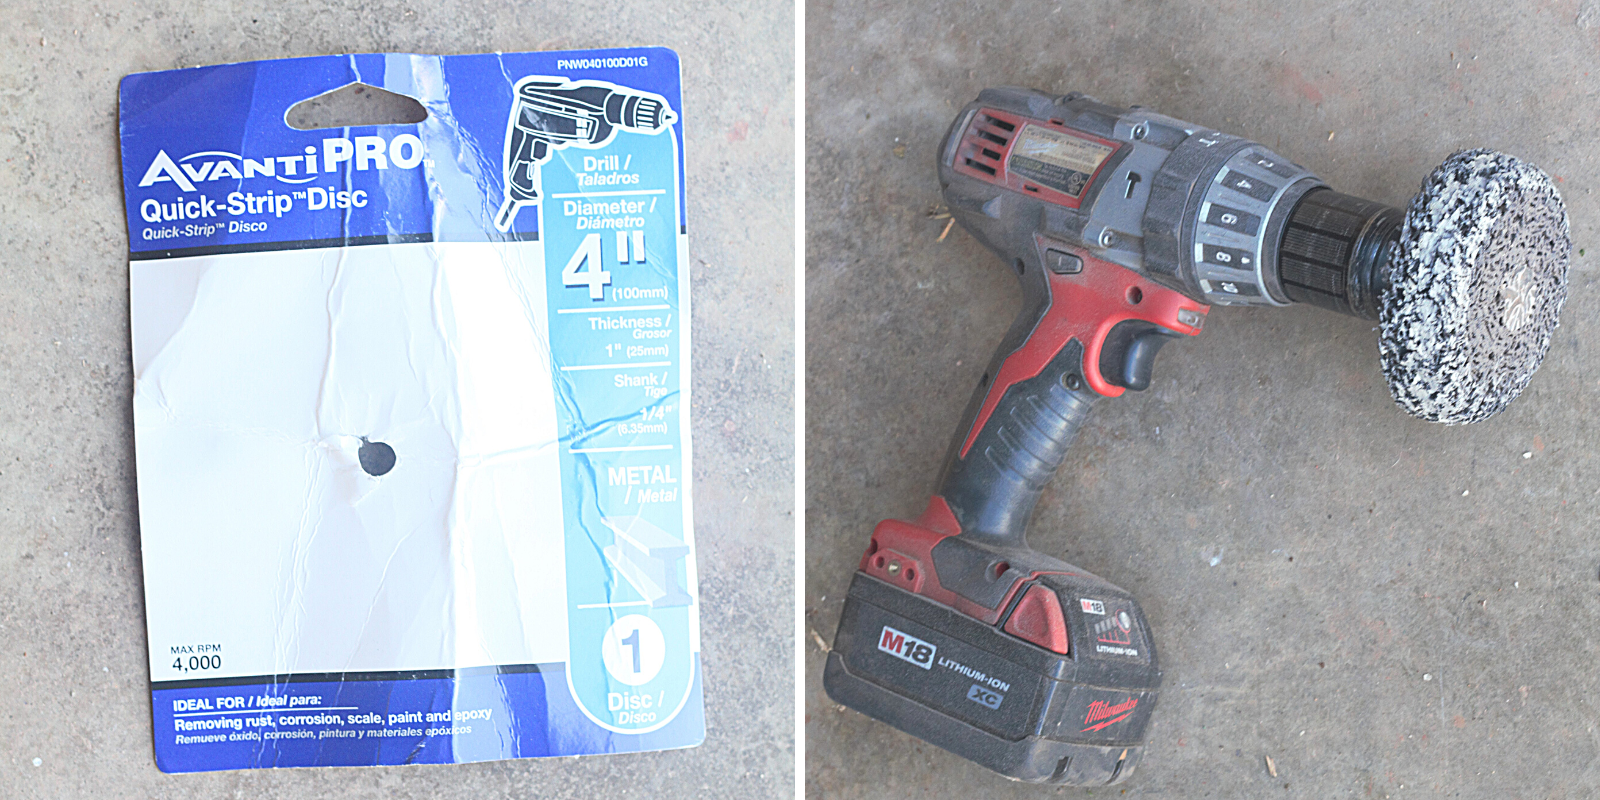
- 4″ sanding disc (drill mount)
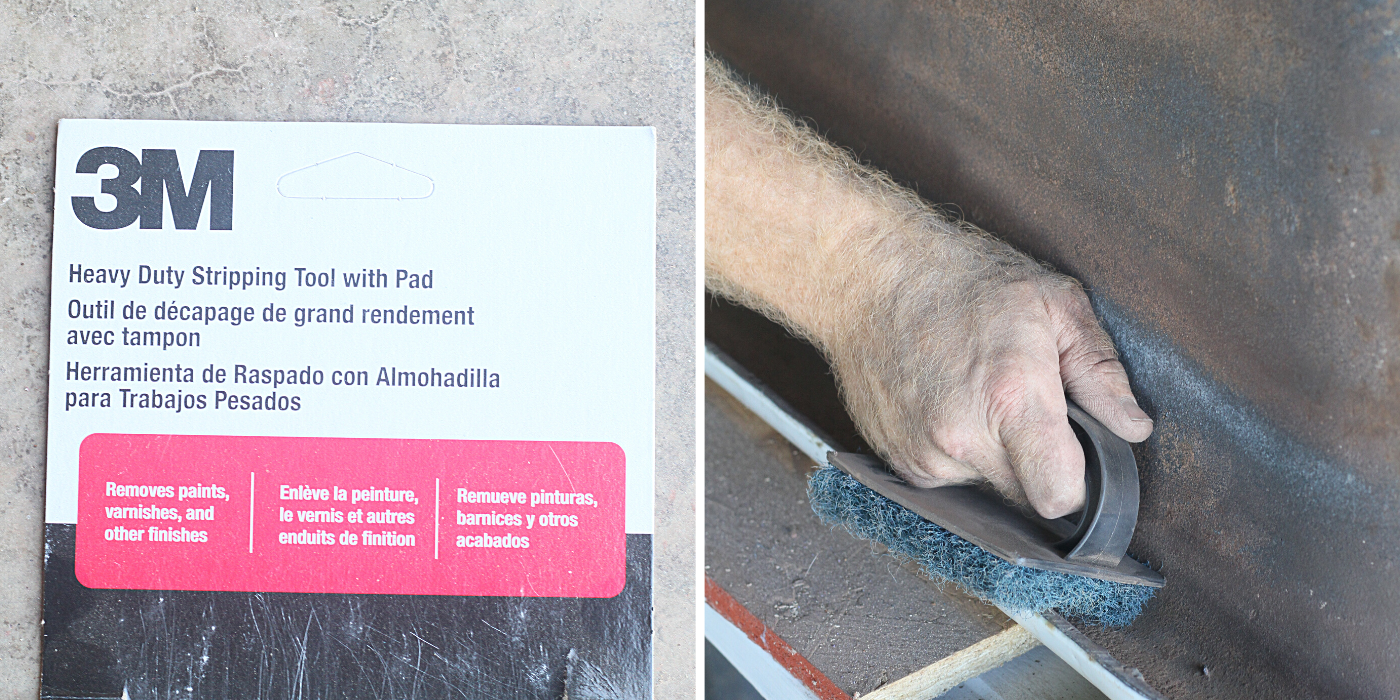
- stripping tool
- shop vac
- wire brush
- sand paper
- spray primer
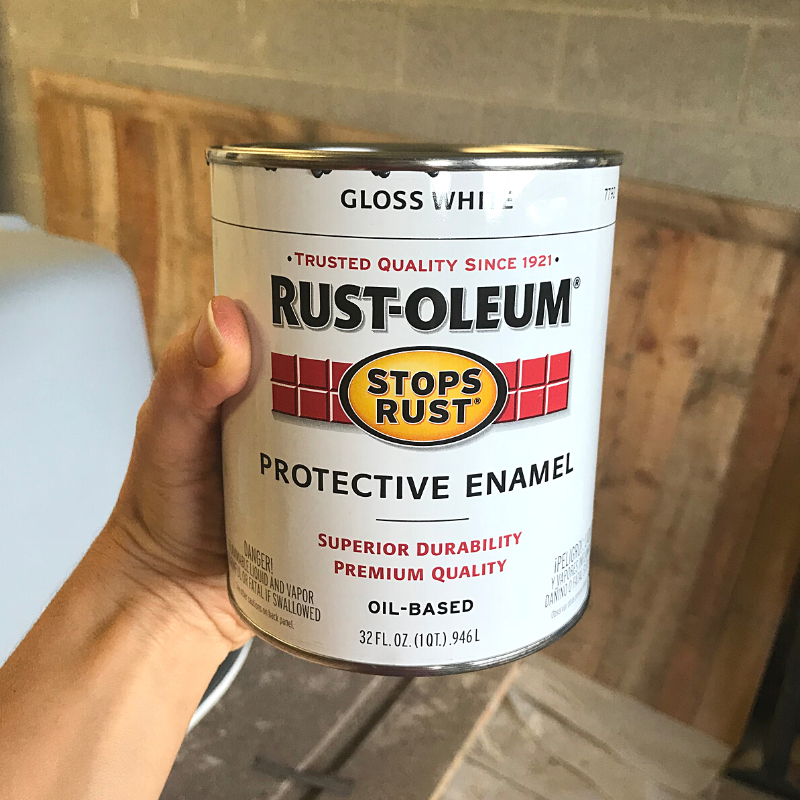
- protective enamel
- small rollers
- small paint brush
Step Three: Scrub the Tub
We actually did this part last, unintentionally. We had flipped the tub over and raised it to sit on top of a makeshift work table, and let me tell you, it’s not easy to flip a cast iron bath tub! So there it stayed while we refinished the outside of the tub.
Throughout the entire process I was so nervous we’d run into problems when it came time to clean the interior and I wished we had cleaned it before flipping it upside down. Thankfully the inside of the tub cleaned up just fine, but I definitely recommend scrubbing the interior of your tub first.
Greg actually did this part of the job because we were running out of time and I had lots of other projects going on! He likes to joke that I’m the visionary and he provides the manual labor. Which is mostly true, what can I say? We make a good team.
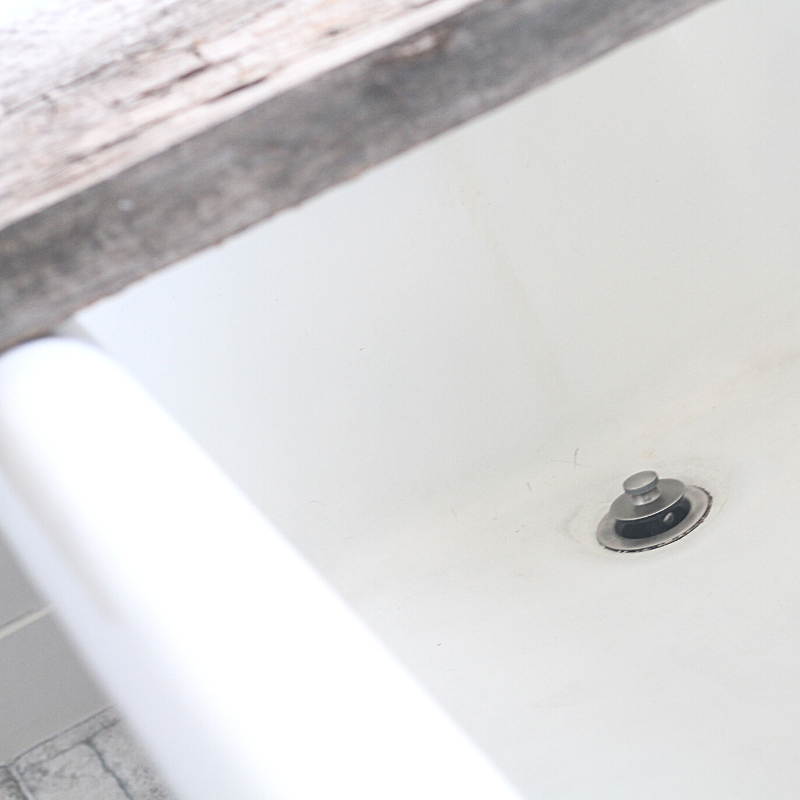
He cleaned our vintage claw foot tub with Wild Orange oil and hydrogen peroxide, and we used a little bit of this natural cleaner concentrate at the end.
The finished result amazed us: no refinishing necessary! The drain area still looks a bit dingy, but it doesn’t bother me and most people wouldn’t even notice.
There are also a few tiny rust spots around the top of the overflow cover, which I may touch up with an enamel kit. For now, I think the imperfections make the tub look authentic, like it’s been here forever.
Step Four: Sand the Exterior
Once again, Greg executed this step. He did it all in just a few hours!
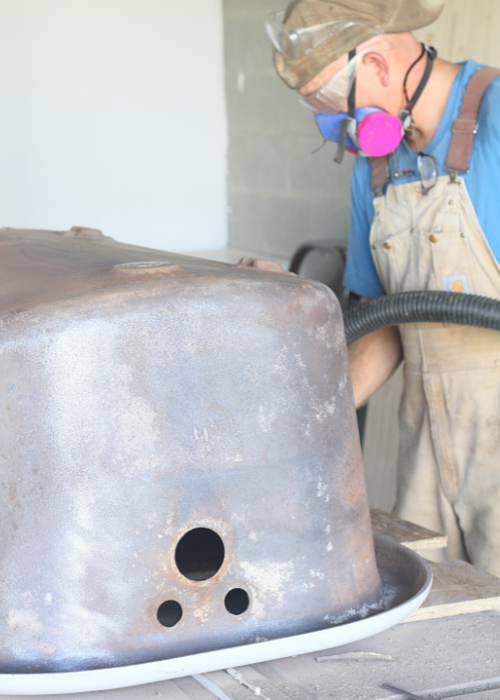
IMPORTANT: Please wear a serious respirator for this step. You do not want to mess around with the possibility of inhaling lead paint dust. Safety glasses are important, too.
First, he used the sanding disc to remove most of the paint from the tub’s exterior.
Then he used a heavy duty stripping tool to get inside the lip of the tub where the sanding disc couldn’t reach.
Finally, he went over the entire tub with a Shop Vac.
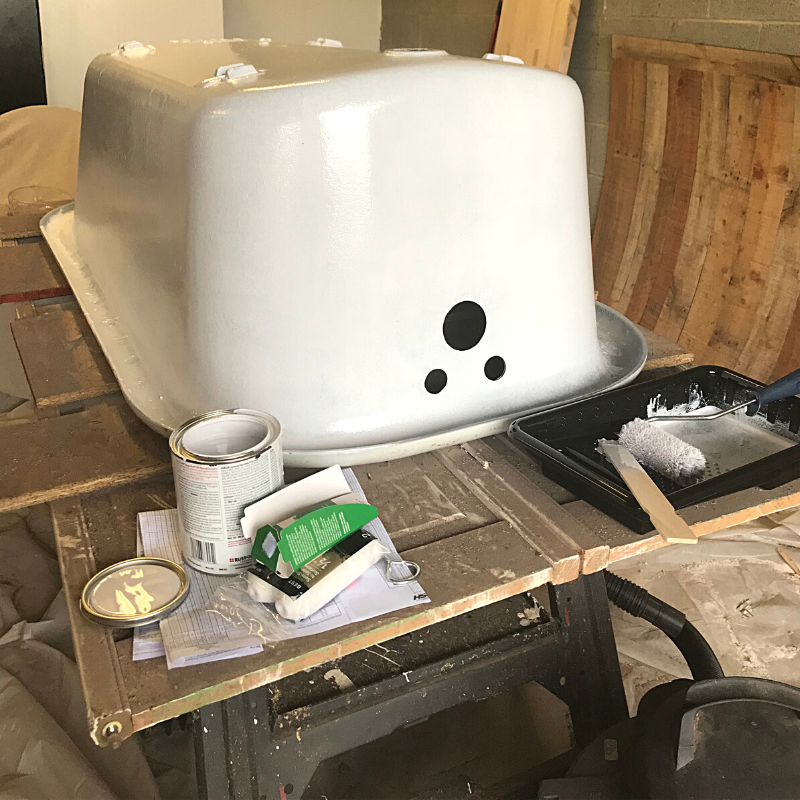
Step Five: Prime the Exterior
IMPORTANT: I recommend a serious respirator for this step, too. And glasses again.
And now for my part: I primed the tub exterior with two coats of Rustoleum Professional Primer. It was so rewarding to watch that old tub turn white! Well, actually it turned gray first, because I used a gray primer.
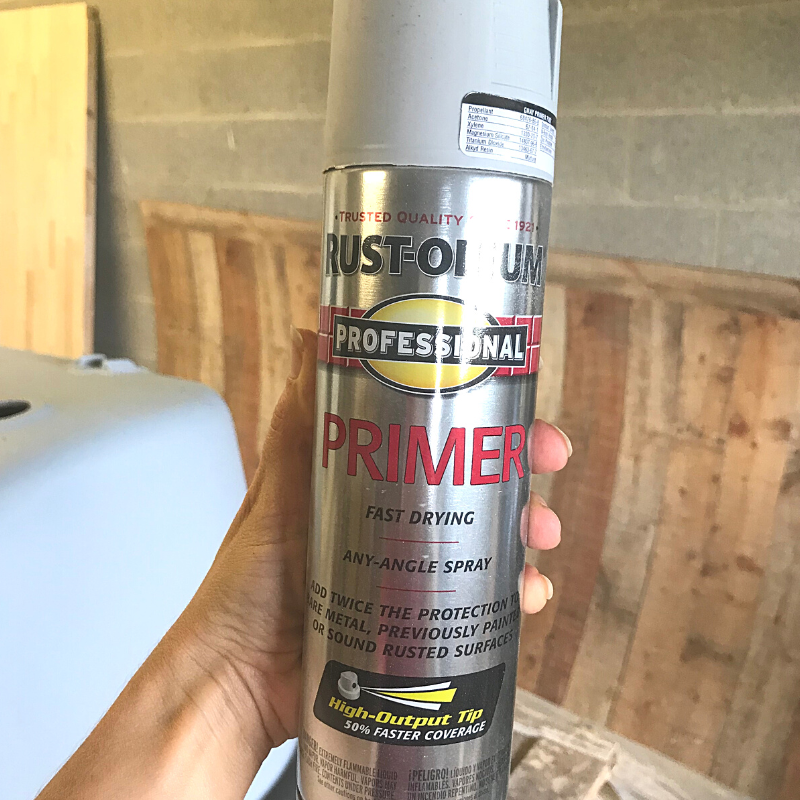
I followed these steps:
- Wipe: before applying primer, I wiped the tub down really well, first with a dry rag and then with a wet rag and finally with a dry rag again.
- First coat: shake well and spray evenly to cover the entire surface.
- Second coat: follow instructions on the paint can for drying time, and then repeat step 2.
Step Six: Paint the Exterior
I did this part, too! See, I did help.
With a small roller, I gave the outside of the tub three coats of this white protective enamel. You’ll obviously need to allow for drying time between coats.
Step Seven: Sand the Feet
Sanding the feet can be tricky: unlike the tub itself, the feet are small and rounded, with crevices and extra details that make it hard to achieve a smooth surface.
I did the best I could with a wire brush and coarse grit sand paper.
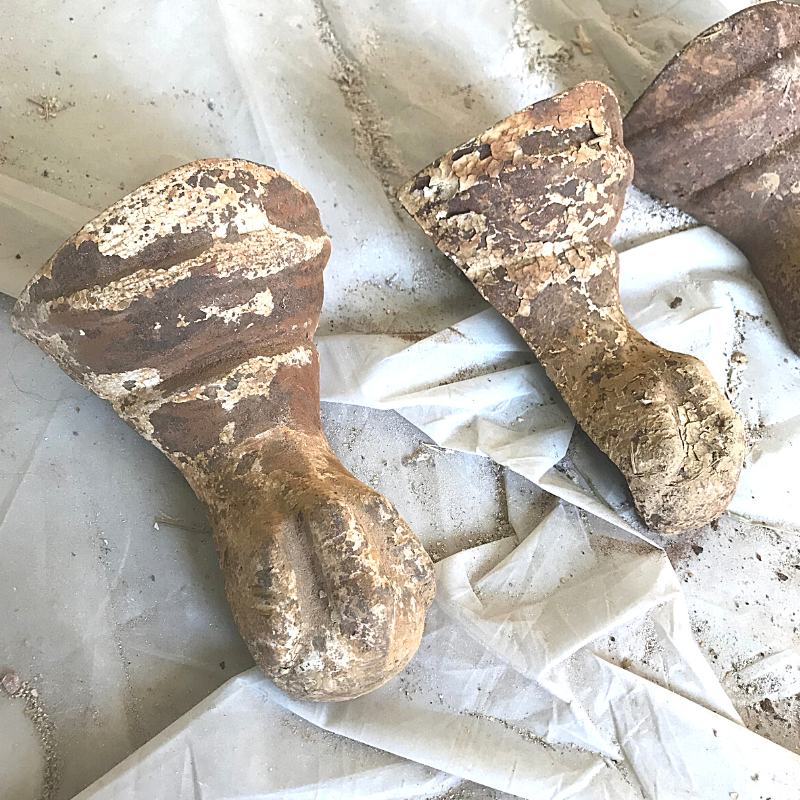
Tip: do your best to sand the back of the feet. I totally spaced out on this one and didn’t sand or paint the backs of the feet, because, I’m embarrassed to admit, I thought no one would see them.
Have I mentioned what an overwhelming time that was? I’m convinced I lost a few brain cells during our transition to the new farm in MAY, which also happens to be the beginning of the growing season AND the animal-raising season. Remember how we accidentally killed 35 chickens due to another silly mistake? Yeah, it’s currently almost one year later and while we’re still definitely in transition, we’re thankful that super-crazy time is behind us.
You’re probably smart enough to realize that, depending on the location of your tub, the backs of at least two feet will be visible. So sand (and paint) the backs of the feet.
Step Eight: Paint the Feet
Again, the feet are totally different from the huge, smooth tub, so a roller isn’t going to work. I used a small paint brush to paint the feet, and I kept adding another coat until they looked well covered, about 3-4 coats.
Remember: paint the front and back of each foot.
PS–The good news is that the unpainted backs of those two feet on the far side are only visible from our bed. (I stood on our bed to take the above picture.) So basically, I’m the only one who notices. Most folks tour our newly renovated space in an upright, standing position, which means they never see my little painting snafu.
Step Nine: Attach the Feet
Now it’s time to attach the feet to the tub! If you’re lucky, your tub will come with all the little necessary parts. Our tub had all four of the little plates but was missing one bolt.
Our contractor picked up an extra bolt that worked well, but you can order the missing pieces from Signature Hardware or elsewhere.
Step Ten: Choose a Faucet
For us, this part of the process took longer than the entire bathroom renovation project, mostly because of the special-order finish I chose for our bathroom but also because of the unbelievable ineptitude of the bathroom designer who “helped” us. It was such a nightmare.
In the end, I got the exact look I was going for and it makes me happy every day, so I guess you could say the excruciating two month ordeal delay was worth it.
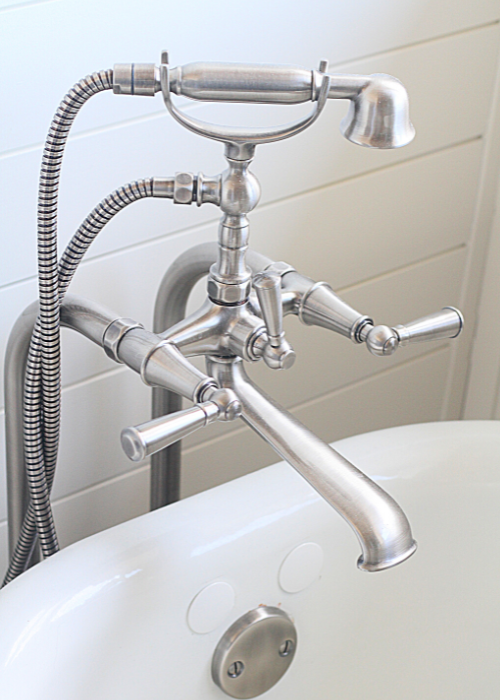
If you choose a standard ready-made faucet option, your process should be easy peasy. The main considerations include:
- tub filler or tub filler + hand held wand
- mounting type: free standing or tub/wall mount
- fixture finish
Tip: Depending on which type of faucet you choose and what your plumbing set up is like, you may be left with two holes to plug. We used these hole covers designed for kitchen sinks, and they worked perfectly.
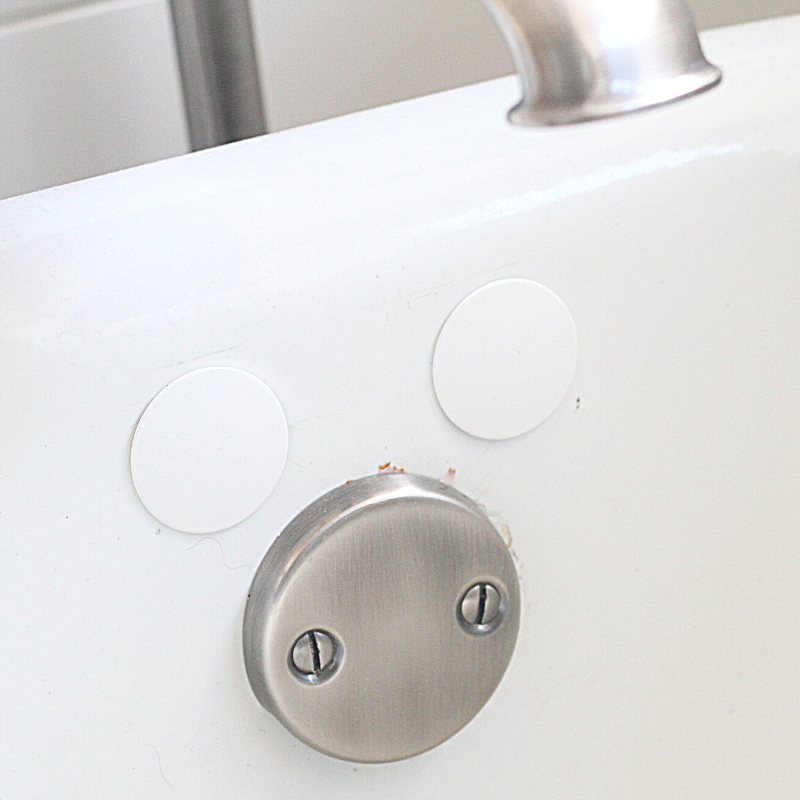
Tip: Make sure your faucet includes all necessary drain parts, overflow cover, and a stabilizer (if you choose a free standing model).
We have a free standing faucet with a hand held wand, plus overflow cover, drain parts, stabilizer (for the free standing pipes), and two white hole covers.
Tub installation
Technically I suppose step eleven is to install the tub and faucet, but we outsourced that to our contractor who did a fantastic job.

Do not disturb
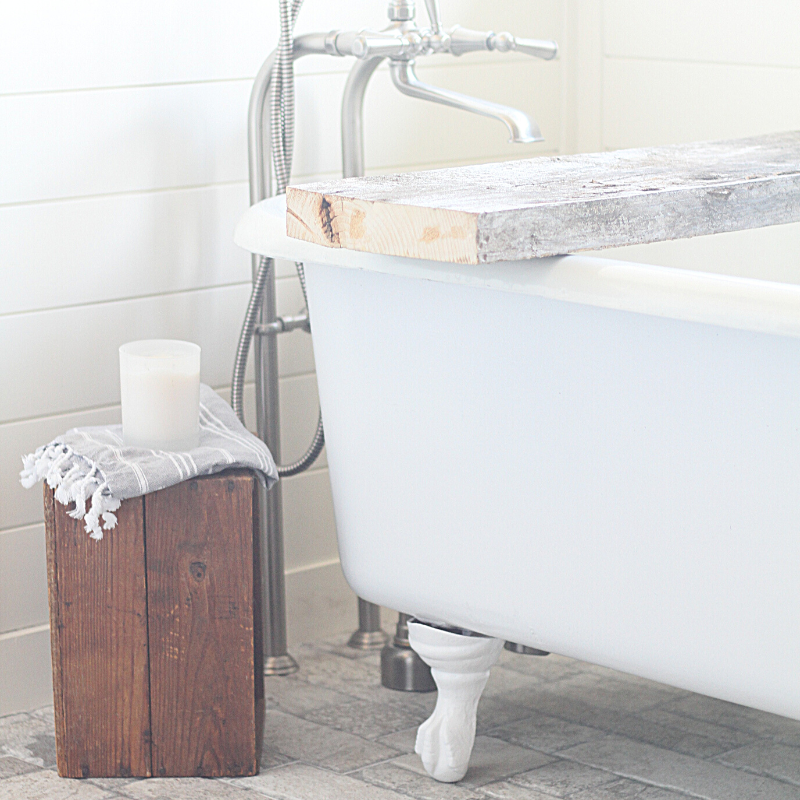
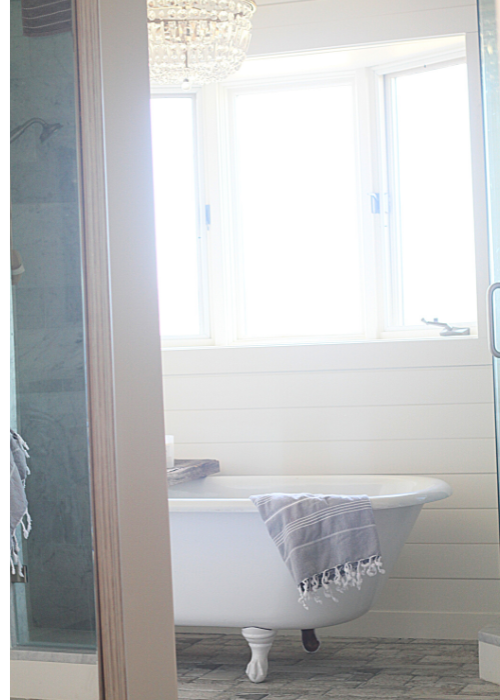
It was definitely a bit of a risk to refinish a vintage claw foot tub, but I’m so glad we did. I love the way it turned out! Plus it saved us a thousand dollars or more.
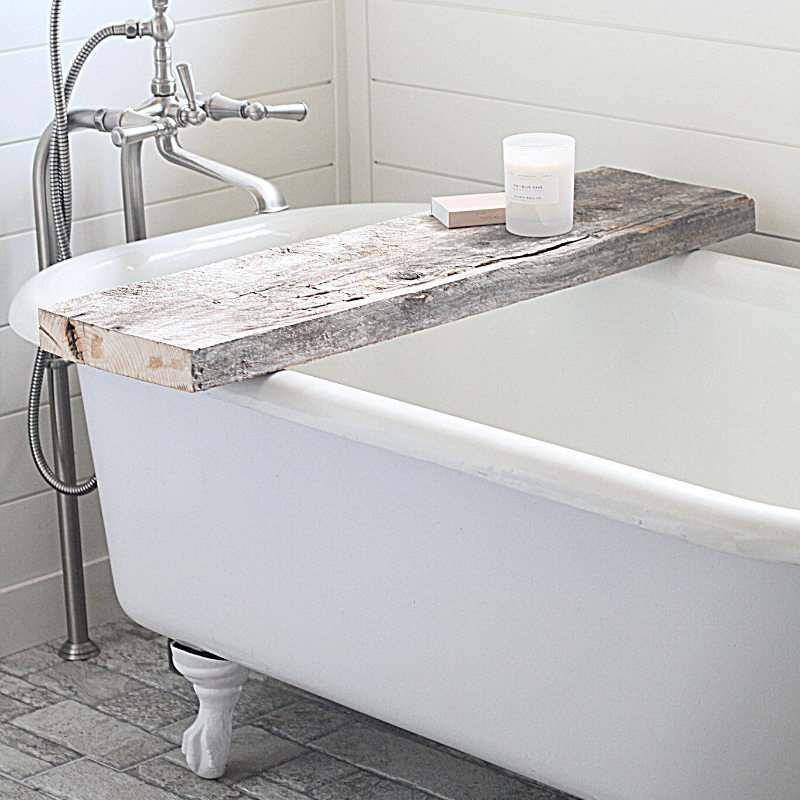
It is such a treat to soak in my big old cast iron tub with my Epsom salts and essential oils, the sparkly chandelier turned way down low, and a (nontoxic) candle burning on my rustic tub board. It’s where I read design books and soak up ideas for the (incredibly) long list of remaining projects in our new farmhouse…
Help! Do you have any tips for finishing the raw ends of my rustic tub board? Greg cut it from an old board that was laying out in the field at the new farm. It’s so perfect! But the ends look all new and freshly cut and I’d love to rough them up a bit. Should I try a gray stain? What do you think?
Do you love old cast iron tubs? Do you think it’s worth the effort to refinish a vintage claw foot tub?
")
Sign up NOW for my best tips delivered weekly to your inbox!
You’ll also get instant access to my library of free ebooks and resources.
You might also like...


4 responses to “How to Refinish a Vintage Claw Foot Tub”
-
I love how you cleaned up your cast iron tub! I still have mine which must be over 30 years old, it is Avocado Green (old fashioned I know) but it is too good to throw it away.
Can you please send me more details on how you cleaned (ie how much orange oil etc.)the interior of the tub as ours is getting a little less shiny now.
I know you are a very busy lady so if you don’t have time to do this, then that’s ok ❤️
-
Hey Linda! Cast iron tubs are awesome! I’m actually the person here on the homestead who scrubbed the tub, so I figured I’d just respond. To be completely honest, there wasn’t an exact measurement for the orange oil mixture, although I would say it was fairly liberal. I put several drops of oil (think 20-30) in a small glass spray bottle (around 12 oz) and went from there. On a few really challenging areas I used a bit more oil and a little hydrogen peroxide–like around the drain.
I would say that any project like this is trial and error. Fortunately for us, the interior of the tub wasn’t all that bad. The exterior was the hardest part. If it were me, other things I’d consider would be baking soda (with hydrogen peroxide) and/or salt. Just test it on a small portion of the tub first to make sure it doesn’t scratch the finish. Since yours is painted it might be different than ours.
I know you probably don’t want to hear this, but I think the thing I used the most was elbow grease! Send us pics of the tub when you’re finished!
-
Hi Mr. Native Texan, thank you for your reply. I will give this a go and send you before and after photographs :).
-
-
-
Tub looks great! So does your floor, what did you use for it?
Leave a Comment