

Fermented Dill Pickles

This post may contain affiliate links, which means I make a small commission at no extra cost to you.
See my full disclosure here.
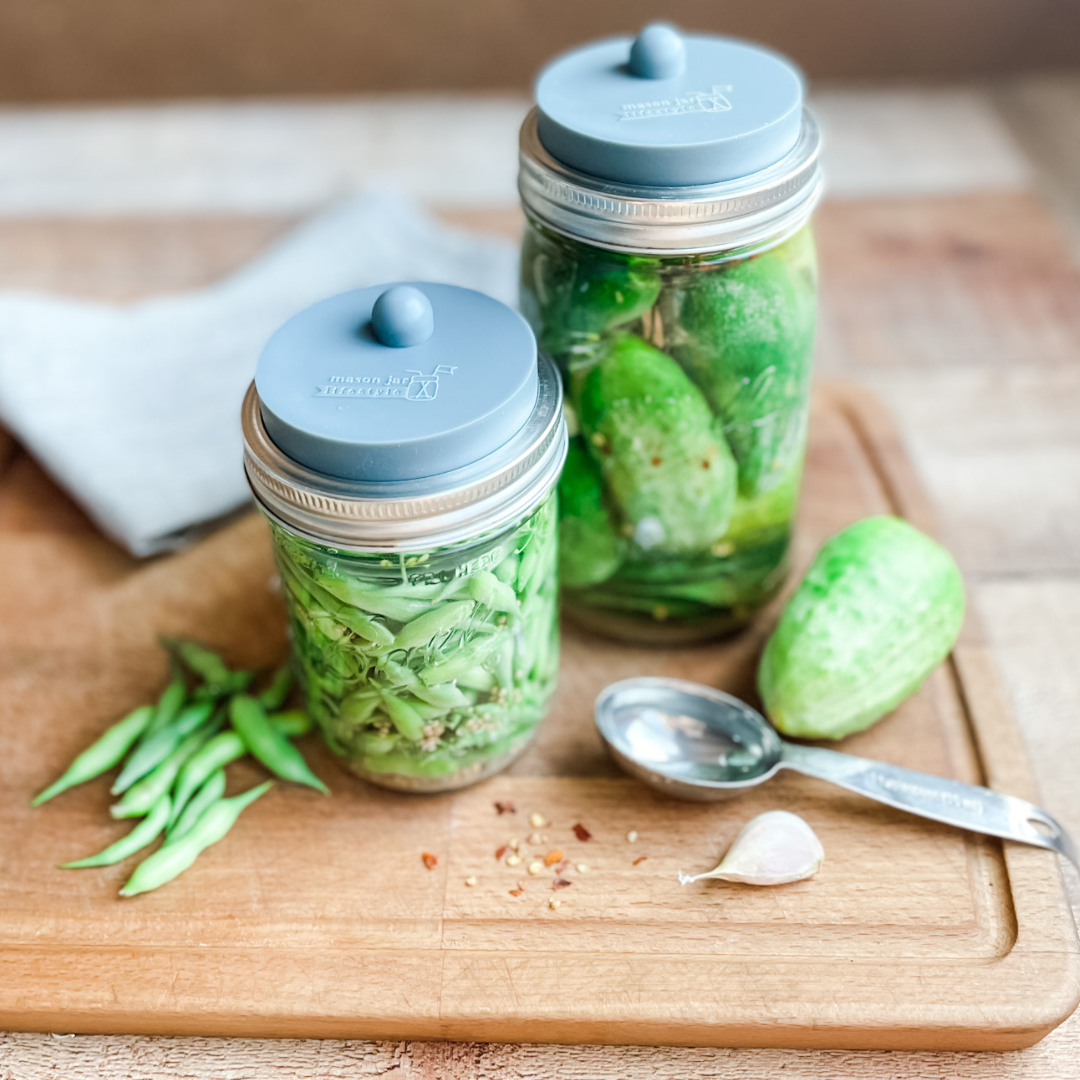
Transform cucumbers into fermented dill pickles to add healthy enzymes and probiotics to your diet. What a great way to use up a bumper crop of cucumbers from the garden or farmers market!

How to make fermented dill pickles
The first time I made a batch of fermented dill pickles, I couldn’t believe how simple it was! Simply combine cucumbers with spices, garlic and dill, then add tannin-rich leaves for crunchiness, and submerge in a salt water brine.
Allow the cukes to ferment for a few weeks, then enjoy or move to storage. So easy!
Here’s a quick video demonstration of the entire process. Can’t see the video? Click here to watch.
Fermentation supplies
Technically, you can make fermented dill pickles without any special supplies. However, I do recommend picking up a few sets of fermentation lids and weights.
This allows you to use mason jars you probably already have on hand, and keeps the process super simple. I like to use half gallon mason jars.
Alternatively, you could invest in a nifty fermenting crock (and lid and weight). One day I might have to add one of these to my kitchen collection!

Crunchy pickles
I’m still a fermentation newbie, having only tackled the process over the last few years. But here’s what I’ve learned about achieving crunchy pickles:
- Tannins: Be sure to include 2-3 tannin-rich leaves. This intimidated me at first, because I came across many recipes calling for grape or horseradish leaves, neither of which I had access to. Then I learned that raspberry, blackberry, oak, and even black tea leaves may also be used. Whichever type of leaf you choose, don’t skip this step if you want to enjoy crunchy pickles.
- Ends: The blossom end and even the vine end of the cucumbers must be removed. If they remain, they can cause mushiness.
- Soak: That 30-minute soak in cold water is also important for producing a crunchy pickle. Consider adding salt to this cold soak, and you may even want to try soaking for hours or even all day. This is a step I plan to experiment with more in my own kitchen.
- Salt: Do not use table salt! Make sure to use unrefined sea salt, celtic salt, or Himalayan salt. The minerals in these salts help to achieve crunchiness and also add nutritional benefits. (Save 15% on my favorite brand of unrefined sea salt with code KEEPITREAL.)
- Varieties: Choose small, fresh, pickling cucumbers when making pickles. Don’t start with large or old cucumbers, and don’t use varieties other than those meant for pickling.
- Size: Whole pickles will stay crunchier than slices or spears. I always ferment whole cucumbers for this reason.
- Timing: I’ve heard that picking cucumbers in the morning, before the day heats up, can help to preserve their crunchiness.
- Age: Try pickling only young cucumbers, as age supposedly makes a difference when it comes to that coveted crunch.
More food preservation recipes
Looking for healthy canning, drying, or freezing recipes? Try these…
- Home Canned Honey Tomato Jam
- Hearty Marinara with Veggies and Ground Beef
- How to Dry Zucchini Noodles

Fermented Dill Pickles
Ingredients
- 4 pounds pickling cucumbers
- 2 flowering dill heads
- 8 garlic cloves, peeled and crushed (or more, to taste)
- 3 tablespoons pickling spice
- 2 bay leaves
- 2-3 tannin-rich leaves (oak, grape, raspberry, horseradish)
- 8 cups water
- 1/4 cup unrefined sea salt, finely ground
Pickling Spice
- 2 tablespoons mustard seeds
- 2 tablespoons allspice, whole
- 2 tablespoons coriander seeds
- 2 tablespoons black peppercorns
- 2 teaspoons whole cloves
- 1 teaspoon ground ginger
- 2 cinnamon sticks, crushed
- 2 bay leaves, crumbled
Instructions
- Mix up the pickling spice, reserving 3 tablespoons for this recipe and storing the rest in an airtight container for future use.
- Trim both ends of each cucumber, fully removing any bits of blossom or vine. Failing to complete this step can lead to mushy pickles.
- Soak the cucumbers for 30 minutes in a large bowl or tub of ice water.
- Remove the cucumbers, dry them, and pack them into two half-gallon jars or into a fermentation crock.
- Divide all remaining ingredients between the two jars except for the water and salt.
- Heat the water on the stovetop until it is warm, but not hot (about 100 degrees F), then add the salt and stir until it dissolves.
- Pour the brine over the cucumbers, taking care that all cukes are fully submerged. If necessary, add a glass fermentation weight on top to keep all the ingredients submerged. You can also use a small plate or glass jar in place of a weight.
- Add a lid to each jar and allow the cucumbers to ferment for 3-4 weeks* in a dark spot. Check on the jars every so often to make sure that all ingredients remain submerged.
- When they reach your desired sourness, move them to storage in the fridge, basement, or a cool-ish spot where they will keep for 6 months or so.
Notes
*Fermentation time seems to vary according to who you ask. Some ferment for only 3-4 days, then transfer to the fridge or to a dark, cool storage spot. Feel free to experiment and find out what works best for you.

22 NOURISHING GLUTEN-FREE SOUP RECIPES
Simplify your dinner prep with these tasty, nourishing soups!
")
Sign up NOW for my best tips delivered weekly to your inbox!
You’ll also get instant access to my library of free ebooks and resources.


Leave a Comment