

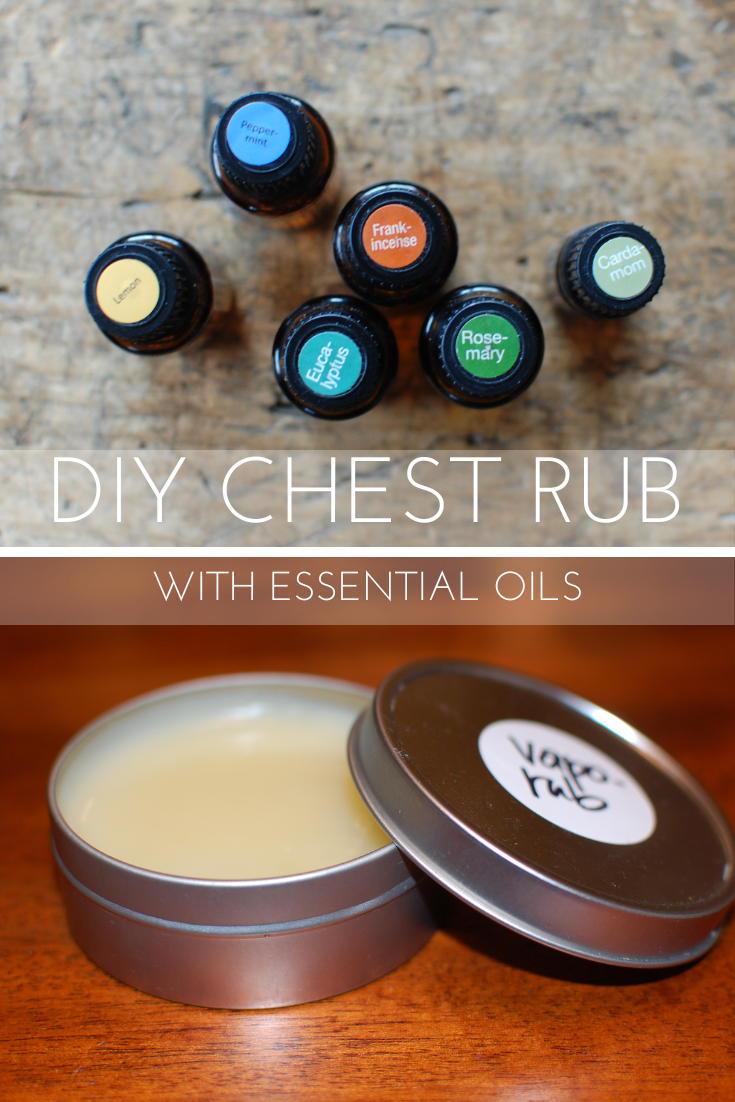
DIY Chest Rub {with essential oils}

Get your free copy of 100+ Amazing Diffuser Recipes today!
No matter what life brings your way, there's a diffuser blend for that! My short, practical ebook is packed with 100+ recipes to diffuse for immune support, sleep & relaxation, energy & good mood, focus & concentration, holiday & seasonal aromas, and more!
This post may contain affiliate links, which means I make a small commission at no extra cost to you.
See my full disclosure here.
It’s that time of year! I hope you won’t have the opportunity to put this recipe to use anytime soon, but if you do, you’ll be ready.
This DIY Chest Rub supports respiratory health, which is especially helpful during the winter months, don’t you think?
Making DIY Chest Rub is very similar to making Hard Lotion Bars, minus one ingredient (shea butter) and with the addition of essential oils that help to maintain clear airways and breathing.
DIY Chest Rub {with essential oils}
Ingredients
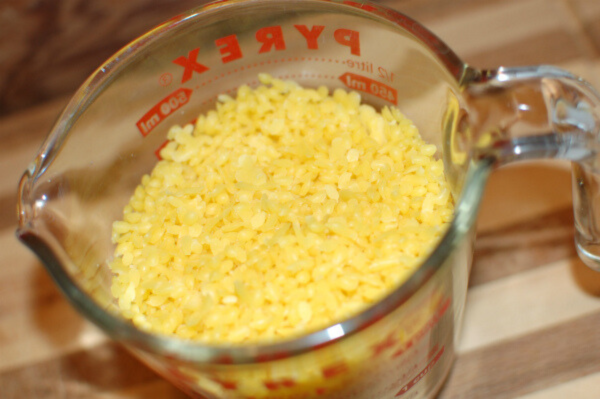
- 1/8 cup beeswax pastilles
- 1/2 cup coconut oil
Essential oils
These are the amounts I used. I’m still experimenting, and would encourage you to do the same. 🙂
- 10 drops Respiratory Blend
- 25 drops Eucalyptus
- 10 drops Rosemary
- 5 drops Frankincense
Supplies
- disposable stir stick (like a bamboo skewer)
- heavy bottomed cooking pot
- glass measuring cup with a handle
- jar or tin for storage*
Procedure
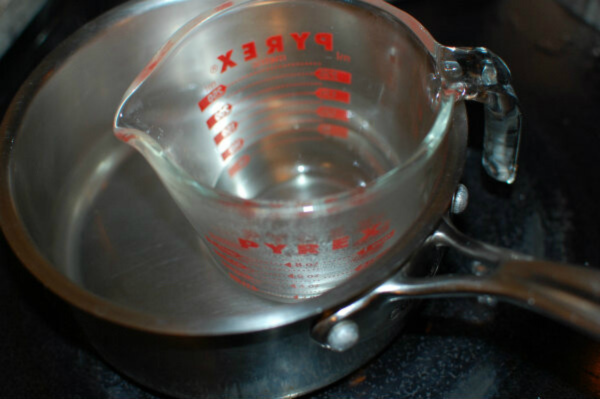
1. Create a double boiler, using a heavy bottomed cooking pot and a glass measuring cup with a handle.
2. Boil a small amount of water in the pot.
3. Add the beeswax and coconut oil to the measuring cup and stir until completely liquified.
4. Add the essential oils and stir to combine.

5. Pour liquid into storage container.
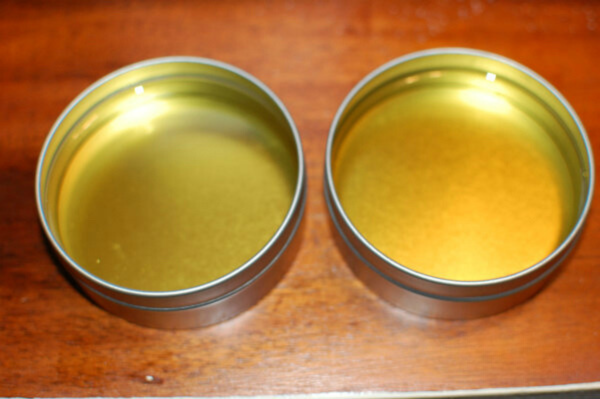
6. Allow mixture to harden. Speed up the process by placing the container in the refrigerator, if desired.
By the way, the first time I made DIY Chest Rub, I wound up deciding that it needed more essential oils. So I just stuck my tins of hardened Chest Rub in the toaster oven and heated them until the rub was liquified. Then I stirred in more essential oils and let them harden again.

*Storage containers
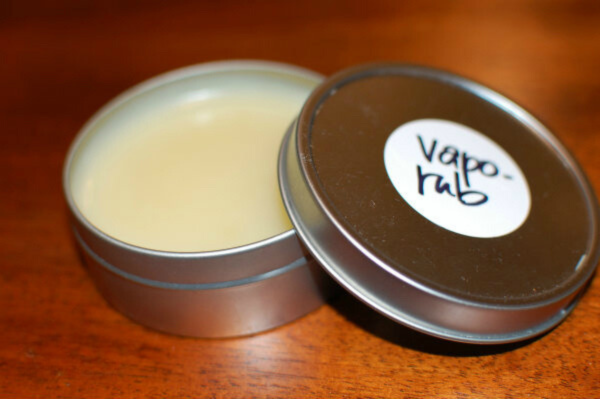
- Metal tins — The tins pictured here are 4 oz shallow seamless tins. Their 4 oz. seamless tins would work well, too.
- Recycled glass jars — Baby food jars would work well, or any small jar that you can easily get your fingers in and out of.
- Glass salve jars — 2 oz or 4 oz glass salve jars are nice for gift-giving.
- Mason jars — 4 oz canning jars are easy to come by and cute, too.
 Hooray for a safe, easy and effective way to support respiratory health!
")
Sign up NOW for my best tips delivered weekly to your inbox!
You’ll also get instant access to my library of free ebooks and resources.
You might also like...


13 responses to “DIY Chest Rub {with essential oils}”
-
Wouldn’t heating the essential oils diminish their therapeutic benefits?
-
Inez–Well, I did think of that. Good question! Technically, EO’s shouldn’t be heated. However, when it comes to congestion, many folks recommend a steam tent (placing a drop or two of oil in a bowl of steaming water, holding your face over the bowl and draping a large towel over your head to make a tent). I figure it’s kind of the same concept, and have decided not to worry about heating the oils in this case. To keep the oils as cool as possible, you could add the EO directly to the storage containers after the mixture has begun to cool, but before it solidifies.
-
-
Are the EO amounts listed in the recipe the first amount you started with, or does it include the extra that you added?
How much extra did you add and of which oils?
Thanks!-
Christy–that is a great question! I’m 99% sure the EO amounts listed above reflect the extra oil I added the second time around. (It’s been a little while since I made mine!) When I make it again, I might add even more EO. It’s very flexible, and if you store the rub in a container that can be heated, you can always re-melt and add more oil. Hope that helps! 🙂
-
-
I never thought that we could also DIY vapor rubs! Great work!
-
Hi how many tins did this recipe make? I love this idea thank you for sharing
-
I NEED to make this!!! I think it’s on my to-do list for tomorrow! 🙂
-
Teresa–Let me know how it goes… 🙂
-
-
How long does it last?
-
Emily–It all depends on how often you use it. 🙂 We’ve found that a little goes a long way; our rub has lasted a long time!
-
-
What is the shelf life (how long is it good for before it goes rancid or stale or no longer usable)? Thank you.
-
Hi Deb, We’ve kept our vapor rub for a year or two or even longer with no issues. Best practice is to make small amounts that can be used up within a few months, but we’ve never had any trouble with our homemade chest rub. Again, I trust the antimicrobial properties of my doTERRA essential oils, but can’t vouch for other brands.
-
-
Hi!
What drop amounts per oil would you recommend on babies (below 1yr) and children 1yr and older?
Leave a Comment