Description
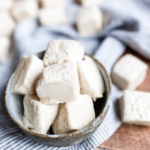
Skip the sketchy ingredients and try homemade paleo marshmallows for roasting, gifting, topping hot cocoa, celebrating Valentine’s Day, Easter, or any day at all!
Ingredients
Scale
- 1 cup filtered water, divided
- 2 1/2 tablespoons powdered gelatin
- 1 1/4 cup raw, local honey
- 1 teaspoon vanilla extract
- Pinch of salt*
- Arrowroot powder or tapioca starch
*Get 15% off your order of my favorite unrefined sea salt with this code: KEEPITREAL.
Instructions
- Line an 8×8 dish with parchment paper. Leave long “handles” which will help to lift out the finished marshmallows. Dust the parchment paper with arrowroot powder.
- Add 1/2 cup water plus 2 1/2 tablespoons powdered gelatin to a large bowl (or to the bowl of your mixer). Allow the gelatin to hydrate for 5 minutes or so.
- Meanwhile, add 1/2 cup water, 1 1/4 cup honey, and a pinch of unrefined sea salt to a large pot over medium-high heat. Insert the candy thermometer and bring mixture to a boil. Watch to make sure it doesn’t foam up too much! Boil the honey mixture for about 12 minutes, until it reaches the soft ball stage of 240-242.
- (It’s helpful to have an extra set of hands for this stage.) Turn on your mixer, and carefully pour the honey mixture into the bowl of gelatin. Be sure to avoid pouring the hot mixture directly onto the beaters.
- If possible, scrape out the pot into the bowl and continue beating, increasing the speed to high. Beat the mixture until it triples in volume. It should be light and fluffy, light in color, and hold its shape a bit when lifted with the beaters. When it’s almost ready, add the vanilla.
- Use the silicone spatula to scrape marshmallow mixture into the prepared 8×8 dish, working quickly. Manipulate the parchment with your hands to eliminate crevices and to allow the mixture to flow into the corners. Shake the dish a bit, to ensure an even layer of marshmallow.
- Chill in the fridge for several hours until set. If you try to cut them too soon, the insides will still be wet and sticky. The marshmallows are fully set when you can peel them away from the parchment with little to no sticking.
- Sprinkle arrowroot powder on top and pat to achieve full coverage. Cut the marshmallows to desired size, then toss or pat with arrowroot powder to coat every side. This keeps them from sticking to each other.
- Store in the fridge for a week or so. Can also be stored in the freezer.
- Optional: freeze dry homemade marshmallows for long-term, shelf-stable storage or gift-giving.
Notes
Please see original recipe post for additional tips and ingredient options.