Description
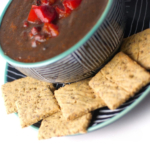
Nutrient dense homemade crackers with fava flour and herbs. I almost always double or even quadruple this recipe for plenty of leftovers.
Ingredients
Scale
- 1 c. fava (chickpea) flour
- 2 TB ground flaxseed
- 1/8 tsp baking soda
- 1/2 tsp unrefined sea salt
- 1/2 tsp thyme
- 1 tsp dried rosemary
- 1 tsp dried sage
- 2 cloves (1 tsp) garlic, minced
- 1/2 tsp olive oil
- 1/4 c. water
Instructions
- Preheat oven to 350.
- Add all dry ingredients to a food processor and mix until well incorporated.
- Add garlic cloves and turn on processor.
- While processor is running, add olive oil and water.
- Add more water if necessary to achieve a workable dough.
- Roll out the dough between two sheets of unbleached parchment paper.
- You want them to be pretty thin in order to get a good crunch. If you want straight, uniform crackers, check out my tip here.
- Use a pizza cutter to cut into small squares.
- Use a fork to poke holes in each cracker (to prevent puffing).
- Bake at 350 for about 15 minutes. When the edges begin to brown, remove the crackers from the oven.[url href=”undefined”][/url]
- Use a metal spatula to dislodge and separate the crackers, removing the crispy ones from the edges.
- Carefully (don’t burn your fingers!) spread out the rest of the crackers on the baking sheet so no edges are touching. Return these crackers to the oven.
- Continue this process, checking the crackers every few minutes to remove any crispy crackers and return the softer ones to the oven.
- I like a very crunchy cracker, so any crackers that are even remotely soft or pliable go right back into the oven.
- Store crackers at room temperature for a few days, or in the fridge for longer periods.